서론
코드잇 AWS 스프링 부트캠프 과정 1기 교육을 듣던 와중, 실습 프로젝트로 간단한 게시판 CRUD 기능과 더불어 "외부 API를 호출하는 방법"을 공부해오라는 미션?을 받았다.
처음에는 Spring 6부터 지원하는 Webflux의 WebClient를 이용하는 방법을 권장했지만 러닝커브로 인해 중간에 동기처리인 RestTemplate을 써도 된다고 하셨다.
JS, 리액트를 찍먹해본 입장으로서 비동기처리의 개념을 알고 있던터라 뭔가 쉽게 배울 수 있지 않을까 싶어서 WebClient 와 관련된 여러 레퍼런스와 유튜버들의 라이브 코딩을 참고해보려했고, 가장 최근 기술인 HttpInterface를 도입해볼까 고민했다.
하지만 아직까진 많은 자료도 없고, 완성되지 않은 생태계인 것 같았다.
그러던 중, 비동기와 동기 방식을 동시 지원 + 짧은 러닝커브 + Webflux 의존성 X 인 "RestClient"에 대해 알게되었고 이 방식을 통해 외부 API를 가져오는 법을 공부했다.
HttpInterface 예상
HttpInterface를 사용하는 방법은 가장 최근 방식이라고 한다.
이 방법은 프록시 팩토리를 만들고 거기에 어뎁터 넣고 그걸 이용해서 Webclient를 만드는 방법인 것 같다.현재 버전의 HttpInterface 그걸 전부 코드로 만들어야 되어서 (AOP 로우 레벨 코드랑 비슷) 아마 시간이 좀 더 지나면 더 업그레이드 되어서 현재 스프링 AOP처럼 간편하게 사용할 수 있을 것으로 예상된다
시작 : RestClient
RestClient란?
- Spring 6.1에서 추가된 HTTP 클라이언트
- 기존 RestTemplate의 대체 역할을 하며 WebClient보다 간단한 방식으로 REST API 호출을 처리할 수 있도록 제공
- Webflux의존성 없이 web만 있어도 된다
- 이 글에서는 RestClient를 활용하여 외부 API에서 게시글(Post) 데이터를 가져오는 방법을 정리한다.
테스트 홈페이지 : https://jsonplaceholder.typicode.com/
- 가짜 API이고 테스트하기 좋음 (인증도 필요 없음)
- 아래 사진처럼 데이터 여러개 보내는 기능도 있다
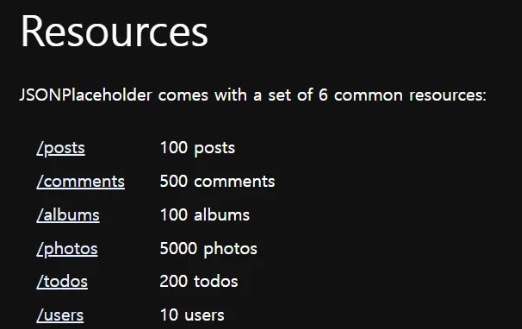
- 이 외부 API를 활용해서 데이터를 가져오는 방법을 공부할 것
예제 목표
외부 API에서 아래의 형태와 같은 Post(게시글)데이터를 가져와 DTO 객체 리스트로 변환하는 기능을 구현한다. (일단은 간단하게 동기 방식)
[
  {
    "userId": 1,
    "id": 1,
    "title": "sunt aut facere repellat provident occaecati excepturi optio reprehenderit",
    "body": "quia et suscipit\nsuscipit recusandae consequuntur expedita et cum\nreprehenderit molestiae ut ut quas totam\nnostrum rerum est autem sunt rem eveniet architecto"
  },
  {
    "userId": 1,
    "id": 2,
    "title": "qui est esse",
    "body": "est rerum tempore vitae\nsequi sint nihil reprehenderit dolor beatae ea dolores neque\nfugiat blanditiis voluptate porro vel nihil molestiae ut reiciendis\nqui aperiam non debitis possimus qui neque nisi nulla"
  },
  {
    "userId": 1,
    "id": 3,
    "title": "ea molestias quasi exercitationem repellat qui ipsa sit aut",
    "body": "et iusto sed quo iure\nvoluptatem occaecati omnis eligendi aut ad\nvoluptatem doloribus vel accusantium quis pariatur\nmolestiae porro eius odio et labore et velit aut"
  },
  {
    "userId": 1,
    "id": 4,
    "title": "eum et est occaecati",
    "body": "ullam et saepe reiciendis voluptatem adipisci\nsit amet autem assumenda provident rerum culpa\nquis hic commodi nesciunt rem tenetur doloremque ipsam iure\nquis sunt voluptatem rerum illo velit"
  },
  {
    "userId": 1,
    "id": 5,
    "title": "nesciunt quas odio",
    "body": "repudiandae veniam quaerat sunt sed\nalias aut fugiat sit autem sed est\nvoluptatem omnis possimus esse voluptatibus quis\nest aut tenetur dolor neque"
  },
  {
    "userId": 1,
    "id": 6,
    "title": "dolorem eum magni eos aperiam quia",
    "body": "ut aspernatur corporis harum nihil quis provident sequi\nmollitia nobis aliquid molestiae\nperspiciatis et ea nemo ab reprehenderit accusantium quas\nvoluptate dolores velit et doloremque molestiae"
},- 각 게시글은
userId,title,body를 포함한다. userId가 존재하므로, 미리 User 데이터를 생성하여 테스트 환경을 구성한다.
1. 사전 세팅
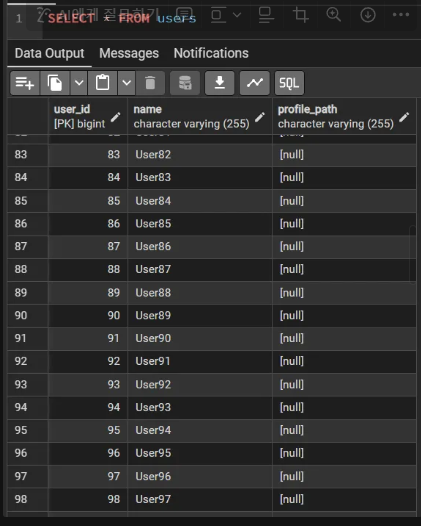
User 데이터 초기화
외부 API의 userId를 활용하기 위해 User 엔티티를 생성하고, @PostConstruct를 사용해 100개의 더미 데이터를 저장한다.
(물론 외부 API에서도 User 데이터를 제공하지만 일단은 하나만 먼저 해보기)
@SpringBootApplication
@RequiredArgsConstructor
public class WeatherApplication {

    private final UserRepository userRepository;

    public static void main(String[] args) {
        SpringApplication.run(WeatherApplication.class, args);
    }

    @PostConstruct
    public void init() {
        for (int i = 0; i < 100; i++) {
            // 간단하게 이름만 넣어줌
            userRepository.save(new User("User" + i));
        }
}@PostConstruct: Spring 애플리케이션 실행 시 한 번 실행되는 초기화 메서드- userRepository.save(new User("User" + i)) : 100명의 User 데이터 생성
외부 API 응답을 받을 DTO 정의
외부 API 응답을 그대로 매핑하기 위해 DTO(Data Transfer Object)를 생성한다.
@Data
public class JsonPostDto {

    public Long userId;
    public String title;
    private String body;
}@Data: Lombok을 활용하여getter,setter,toString,equals,hashCode자동 생성- 불변객체 그런건 지금 중요한게 아니니 @Data만 사용
- DTO의 불변성 필요 이유는 이해는 하고 있다. But 개인적으로 이 부분에 대해서는 개발의 편의성 VS 정확성 에 대해서 고민을 많이 해봤고, 여타 유튜브 라이브 코딩-인프런 강의 들을 봐도 별 신경 안쓰고 @DATA 사용하는데 이 부분에 대한 고찰은 나중에(배달의민족 전 CTO 曰 : 실무에서 그렇게 중요한 부분이 아니라 그냥 쓴다)
- JSON 응답 구조와 동일한 필드를 선언하여 자동 매핑 가능
2. RestClient 설정 및 API 호출 메서드
API 호출 서비스
@Component
public class JsonPostApi {

    private final RestClient client;

    public JsonPostApi(RestClient.Builder builder) {
        this.client = builder.baseUrl("https://jsonplaceholder.typicode.com").build();
    }

    // 외부 API를 호출하여 100개의 Post를 DTO로 변환하여 List로 반환
    public List<JsonPostDto> getPosts() {
        return client.get()
                .uri("/posts")
                .retrieve()
                .body(new ParameterizedTypeReference<List<JsonPostDto>>() {
                });
    }
이렇게 만들어 놓고 빈에 등록한 뒤 이 빈을 다른 곳에서 사용하면 된다
코드 분석
1.RestClient.Builder
- RestClient 객체 생성을 위한 Builder
- RestClient.Builder를 스프링 컨테이너에서 주입받고, 이를 이용할 준비
- RestClient는 빌더패턴을 사용해서 생성해야 한다.
- 반면 RestClient.Builder는 스프링이 제공하는 빌더 객체
- 즉, RestClient 객체는 바로
@Autowired로 주입받을 수 없다.
2.baseUrl 설정
- 말그대로 baseUrl 설정하는 것
- 만약 인증이 필요하면? ⇒ API 키나 토큰을 헤더에 추가
토큰 예시 ```kotlin public JsonPostApi(RestClient.Builder builder) { this.client = builder .baseUrl("https://jsonplaceholder.typicode.com") .defaultHeader(HttpHeaders.CONTENT_TYPE, MediaType.APPLICATION_JSON_VALUE) .defaultHeader(HttpHeaders.ACCEPT, MediaType.APPLICATION_JSON_VALUE) .defaultHeader("Authorization", "나의 토큰") .build(); } ``` API Key 예시 ```kotlin .defaultHeader("x-api-key", "나의 API 키") ```
- 메서드
client.get().uri("/posts")→ GET 요청 전송- 다른 HTTP 메서드를 사용하려면 get이 아니라 post, put 이런거 사용하면 된다.
.retrieve().: API 호출을 수행body(new ParameterizedTypeReference<List<JsonPostDto>>() {});- 응답 바디를
JsonPostDto리스트로 변환
- 응답 바디를
     private final RestClient client;

     public List<JsonPostDto> getPosts() {
         return client.get()
                 .uri("/posts")
                 .retrieve()
                 .body(new ParameterizedTypeReference<List<JsonPostDto>>() {
                 });
     }
3. 컨트롤러에서 사용
@RestController
@RequiredArgsConstructor
@RequestMapping("/api/posts")
public class PostController {

        // 주입 받고 사용
    private final JsonPostApi jsonPostApi;

    @PostMapping
    public ResponseEntity create() {
            // 미리 만든 메서드를 통해 DTO 반환
        List<JsonPostDto> posts = jsonPostApi.getPosts();
        postService.saveJsonDtp(posts);
        return ResponseEntity.ok().body("ok");
    }
번외 : 비동기 방식
지금까지 .body를 이용한 방식은 동기 방식이다.
RestClient는 기본적으로 동기(Synchronous) 방식이지만, 내부적으로는 WebClient를 기반으로 하므로 비동기(Asynchronous) 방식도 지원할 수 있다.
설정 코드
dependencies {
    implementation 'org.springframework.boot:spring-boot-starter-webflux'
}
비동기 방식을 사용하려면 webflux 의존성을 추가해야 한다
아직 완전한 동기화 지원은 정식 버전에서 지원하지 않은 채로 일부 배포판(스냅샷 등)에서만 보였다가 사라졌다 한다고 한다
따라서 야메로 아래와 같은 방법을 사용할 수는 있는데 이걸 이해할거면 그냥 Webclient의 Mono를 쓰면 되지않을까?? ㅋㅋ
    // 동기 호출을 비동기로 감싸기
    public CompletableFuture<List<JsonPostDto>> getPostsAsync() {
        return CompletableFuture.supplyAsync(() -> {
            // 원래 동기적으로 동작하는 getPosts()를 호출
            return client.get()
                    .uri("/posts")
                    .retrieve()
                    .body(new ParameterizedTypeReference<List<JsonPostDto>>() {});
        }, CompletableFuture.delayedExecutor(1, TimeUnit.SECONDS));
    }
그래도 코드 분석
RestClient는 동기적으로 응답을 가져오지만, 이 로직을 쓰레드 풀(Executor)에서 실행해 메인 쓰레드를 블로킹하지 않는 효과를 낼 수 있음CompletableFuture로 감싸므로 메서드 반환 시점에는 이미 새로운 쓰레드에서 API 요청이 진행 중.- 결과가 필요할 때는
future.get()등을 통해 받을 수 있고, 그 전에는 블로킹되지 않음
그냥 이런거 배울 바에 WebClient 배우는 데 현재 비동기 방식이 그렇게 중요한게 아니라 외부 API 호출이 중요한거라…. 나중에 필요할 떄 Mono? 이거 다루는 법 배울 것
마무리 : RestClietn 선택 기준
- 단순한 API 요청을 동기적으로 처리할 경우
RestClient추천 - 비동기 요청 및 높은 성능이 필요하면
WebClient사용 고려
'백엔드 > 스프링' 카테고리의 다른 글
| 단위 테스트가 어려운 이유: 과도한 Mocking (0) | 2025.03.29 |
|---|---|
| 복잡한 동적 쿼리 테스트하기 (0) | 2025.03.27 |
| Spring에서 파일 다운로드 코드 구현하기 (다양한 리소스) (0) | 2025.03.10 |
| Swagger 테스트 시 - application/octet-stream is not supported (0) | 2025.03.05 |
| Swagger 오류 : Failed to load API definition (1) | 2025.02.24 |


